What Are the Two Paths to AI Assistance?
Continue provides two distinct ways to configure your AI assistant: Think of Continue’s configuration options like choosing between a managed service and self-hosting. Both get you to the same destination—powerful AI assistance in your IDE—but the journey and control level differ significantly.How to Access Your Assistant Configuration
Before we dive into the specifics, let’s understand how to access your configuration:- Open the Continue Chat sidebar by pressing cmd/ctrl + L (VS Code) or cmd/ctrl + J (JetBrains)
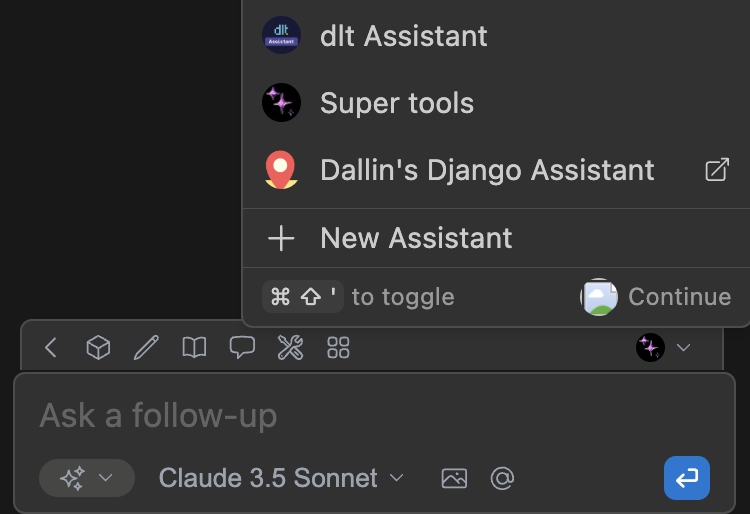
- Click the Assistant selector above the main chat input
- Hover over an assistant and click:
new windowicon for Hub assistantsgearicon for Local assistants
What Are Hub Assistants: The Managed Experience
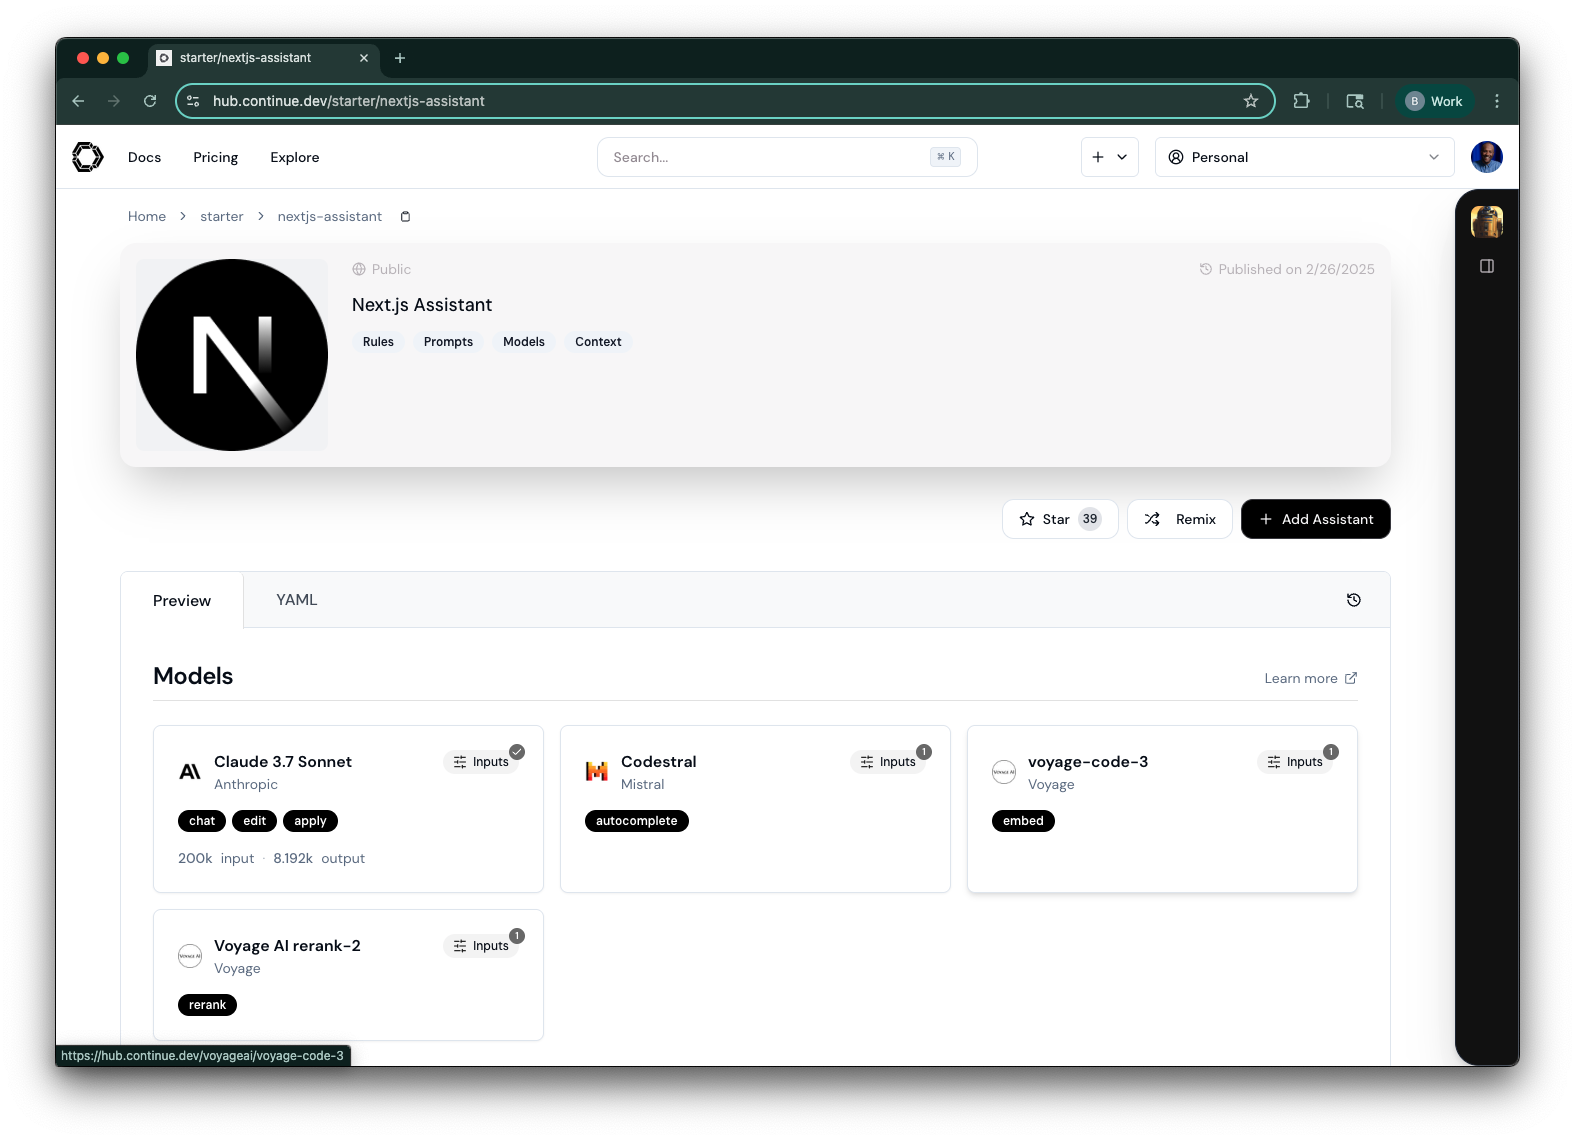
Hub Assistants represent the “it just works” philosophy. When you sign in to Continue Hub, you gain access to a curated ecosystem of pre-configured assistants that sync seamlessly across all your development environments.Why Should You Choose Hub Assistants?
The Power of Simplicity- Instant Setup: Browse the assistant marketplace and add any assistant to your account with a single click
- Web-Based Management: Configure models, add secrets, and customize settings through an intuitive web interface—no JSON editing required
- Automatic Synchronization: Make a change on the hub, and it reflects immediately across all your IDE instances
- Team Collaboration: Share custom assistants with your team, ensuring everyone uses the same optimized configurations
How to Get Started with Hub Assistants
The journey from zero to AI-powered coding takes just four steps:- Select Your Assistant: Click the assistant selector in your IDE’s Continue panel
- Explore or Create: Browse community assistants or craft your own specialized helper
- Secure Your Keys: Add API keys as User Secrets in the hub—they’re encrypted and never exposed
- Sync and Code: Click “Reload config” to pull your latest settings
How to Manage Hub Assistants
All Hub Assistant management happens through the Hub. For detailed customization, see our guide on Editing an Assistant.What Are Local Assistants: The Power User’s Choice
Local Assistants put you in the driver’s seat. Using aconfig.yaml file, you have complete control over every aspect of your AI assistant’s behavior, with all configuration stored directly on your machine.
Why Should You Choose Local Assistants?
Complete Control and Privacy- Your Data, Your Rules: All configuration stays on your machine—perfect for air-gapped environments or strict data policies
- Version Control Integration: Check your
config.yamlinto git alongside your code, ensuring reproducible environments - Offline Capability: Once configured, no internet connection needed (assuming you’re using local models)
- Unlimited Customization: Access every configuration option, experimental feature, and advanced setting
How to Set Up Local Assistants
Local configuration lives in a single YAML file in your home directory: File Locations:- macOS/Linux:
~/.continue/config.yaml - Windows:
%USERPROFILE%\.continue\config.yaml
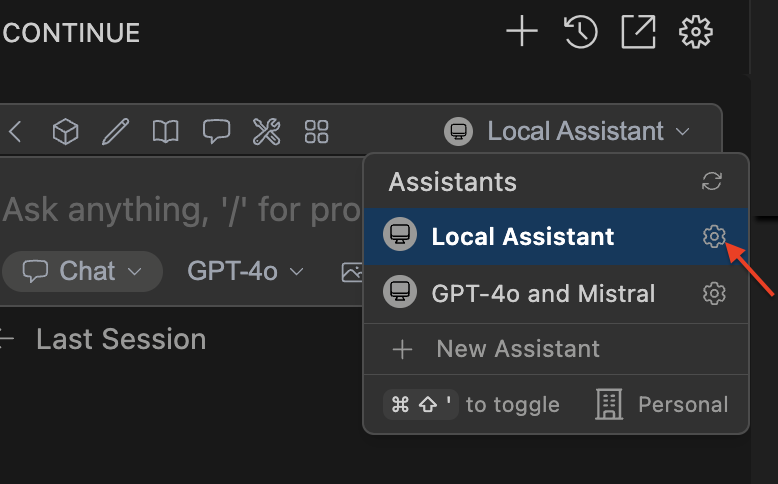
- Open the assistants dropdown in your IDE
- Click the gear icon next to “Local Assistant”
- The
config.yamlfile opens in your editor
The Local Assistant Experience
When you edit yourconfig.yaml, Continue provides intelligent autocomplete for all available options. Save the file, and Continue automatically reloads your configuration—no restart required.
The first time you use Continue, it generates a config.yaml with sensible defaults. From there, you can customize everything from model selection to context providers, slash commands, and more.
For the complete configuration reference, see our config.yaml documentation.
How to Make the Right Choice
The decision between Hub and Local assistants often comes down to your specific needs and constraints. Here’s a framework to help you decide:Choose Hub Assistants When You:
Value Convenience Over Control- Want to start coding with AI assistance in under 60 seconds
- Prefer visual interfaces over editing configuration files
- Need to switch between multiple machines frequently
- Work in a team that needs standardized AI assistance
- Want to share custom assistants with teammates
- Need centralized API key management
- Require quick updates across your entire organization
- New to AI-powered development
- Want to experiment with different models and configurations
- Prefer guided setup experiences
Choose Local Assistants When You:
Require Maximum Control- Need to version control your exact configuration
- Want to customize every aspect of the AI behavior
- Require reproducible development environments
- Work with sensitive code that requires air-gapped environments
- Need to ensure all configuration data stays local
- Have strict compliance requirements about data storage
- Comfortable editing YAML/JSON files
- Want access to experimental features
- Need to integrate with local tools and scripts
How to Use the Hybrid Approach
Here’s a secret: you don’t have to choose just one. Many developers use both approaches:- Hub Assistants for general development and experimentation
- Local Assistants for production work or client projects with specific requirements
Common Patterns and Best Practices
For Hub Assistant Users
- Start with Community Assistants: Before creating your own, explore what others have built
- Use Secrets Properly: Never hardcode API keys—always use the User Secrets feature
- Create Specialized Assistants: Make different assistants for different contexts (frontend, backend, DevOps)
- Share Liberally: If you create something useful, share it with the community
For Local Assistant Users
- Version Control Your Config: Treat your
config.yamllike code—commit it, review changes, and maintain history - Use Environment Variables: For sensitive data, reference environment variables instead of hardcoding values
- Document Your Setup: Add comments to your config explaining non-obvious choices
- Keep a Backup: Before major changes, save a working copy of your configuration
Troubleshooting and Tips
Hub Assistant Issues
Changes Not Reflecting?- Click “Reload config” in your IDE
- Check your internet connection
- Ensure you’re signed in to the correct account
- Verify it’s added to your account on the hub
- Check if it requires specific API keys
Local Assistant Issues
Config Not Loading?- Verify file location matches your OS
- Check YAML syntax (Continue will show errors)
- Ensure file permissions allow reading
- Update to the latest Continue version
- Check that you’re editing the correct file
Next Steps
Now that you understand both configuration approaches, you’re ready to dive deeper:- For Hub Users: Create Your First Assistant
- For Local Users: Explore the Config Reference
- For Everyone: Discover Available Models